一. Hexo修改主题
Hexo 默认的主题是 landscape,如果想要博客渲染更为美观,可自行修改主题。修改 Hexo 主题很方便,首先下载所需主题,放到
themes文件夹内,然后修改_config.yml内的theme设定,即可修改主题。下面以NexT主题为例。
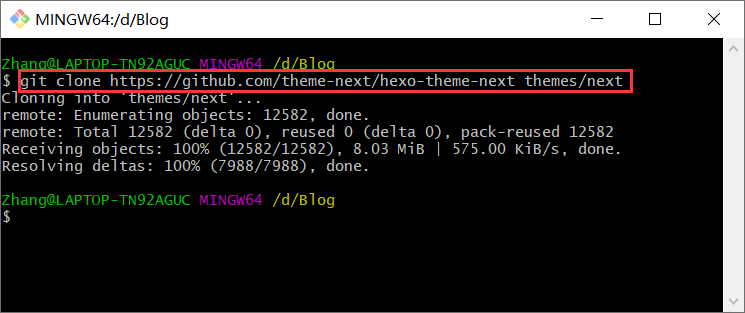
下载 NexT 主题,并放到 themes/next 文件夹中
1
git clone https://github.com/theme-next/hexo-theme-next themes/next
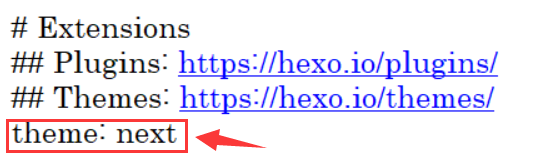
修改 _config.yml 文件,将 theme 修改为 next
1
theme: next
之后再使用
hexo clean、hexo g、hexo d命令远程部署后,打开网站就会发现主题焕然一新。
二. NexT主题优化
通过修改 NexT 主题的一些配置进行优化(中文参考文档 http://theme-next.iissnan.com/getting-started.html),下面如果不特殊说明,默认修改的是 NexT 主题配置文件(Blog\themes\next\_config.yml),而不是Hexo配置文件(Blog\_config.yml),注意区分。
1、风格方案
可选:Muse( 默认)、Mist、Pisces、Gemini,可以根据喜好选择自己喜欢的方案。
1 | # --------------------------------------------------------------- |
2、导航栏菜单设置(首页、标签、归档等)
1 | menu: |
若想添加【分类】页面,除了修改上述配置文件外,还需要在 Git Bash 中输入hexo new page categories新建一个分类页面,否则点击分类会出现 404。在 Blog\source 文件夹下会生成 categories\index.md 文件,编辑此文件,添加type: "categories";
1 | title: categories |
之后在新生成文件后,可以在最开头加上 categories: 类别,如:
1 | title: GitHub+JSDelivr+PicGo+Typora搭建个人图床 |
【标签】页面与【分类】页面新建类似,hexo new page tags;
【关于】页面与【分类页面新建类似,hexo new page about,在 Blog\source 文件夹下会生成 about\index.md 文件,之后可以根据需要在 index.md 文件中书写相关内容。
3、设置侧边栏(显示头像、社交账号等)
1 | # 头像 |
4、设置文章目录
1 | toc: |
5、设置代码高亮主题和代码复制按钮
可选样式为:normal | night | night eighties | night blue | night bright | solarized | solarized dark | galactic
1 | codeblock: |
6、首页文章部分预览
在首页,文章默认会全文显示,若想仅预览(显示)文章的前面一小部分。只需要在编写的md文章中,插入<!--more--> ,首页便只会显示此标记以前的内容。
7、添加文章版权信息
1 | creative_commons: |
注意需要将 Hexo 配置文件,(即 Blog\_coonfig.yml)中的 url 修改为自己的域名,否则显示本文链接时会出现问题。
1 | url: https://SniperCoding.github.io/ |
8、统计阅读人数/访客数信息
1 | busuanzi_count: |
9、统计文章字数/阅读时间
安装
hexo-symbols-count-time插件,在 Git Bash 中输入以下命令进行安装1
npm install hexo-symbols-count-time --save
修改 NexT 配置文件(Blog\themes\next\_config.yml)
1
2
3
4symbols_count_time:
separated_meta: true # 是否另起一行显示(即不和发表时间等同一行显示)
item_text_post: true # 首页文章统计数量前是否显示文字描述(本文字数、阅读时长)
item_text_total: true # 页面底部统计数量前是否显示文字描述(站点总字数、站点阅读时长)在 Hexo 配置文件(Blog\_config.yml)中新增如下内容
1
2
3
4
5
6symbols_count_time:
time: true # 是否统计文章阅读时长
symbols: true # 是否统计文章字数
total_time: true # 是否统计站点总阅读时长
total_symbols: true # 是否统计站点总字数
exclude_codeblock: true # 是否排除代码字数统计
10、侧栏显示阅读进度百分比
1 | back2top: |
11、顶部加载阅读进度条
安装
reading_progress模块,在 Git Bash 输入以下命令进行安装1
git clone https://github.com/theme-next/theme-next-reading-progress themes/next/source/lib/reading_progress
修改 NexT 配置文件
1
2
3
4
5reading_progress:
enable: true # 是否启用进度条
position: top # 进度条位置(top | bottom)
color: "#37c6c0" # 进度条颜色
height: 3px # 进度条高度
12、添加评论系统(Valine)
获取
APP ID和APP Key进入官网 LeanCloud 进行注册, 注册登陆认证后进入应用,点击创建应用,输入任意名称,并选择开发
版,点击创建。进入所创建的应用,选择左下角的
设置>应用凭证,就看到APP ID和APP Key了。将博客域名添加到安全域名中
进入所创建的应用,选择左下角
设置>安全中心,然后将自己的博客域名(举例:https://snipercoding.github.io/)填写在Web安全域名中,并保存。修改 NexT 配置文件
1
2
3
4
5
6
7
8
9
10
11
12
13
14valine:
enable: true # 是否启动valine评论
appid: xxxxxx # 你的aapid【重要】
appkey: xxxxxx # 你的appkey【重要】
notify: true # 是否开启评论回复邮件通知
verify: true # 评论前是否开启验证码
placeholder: 撰写你的评论叭~ # 评论框的占位符
avatar: mm # 头像风格
guest_info: nick,mail,link # 自定义评论标题【昵称,邮箱,网址】
pageSize: 10 # 分页大小
language: zh-cn # 语言
visitor: false # 是否允许游客评论
comment_count: true # 评论计数是否显示在主页
recordIP: false # 是否记录注释IP评论数据管理
当想要管理用户的评论时,比如删除一些不当评论,可以到在 LeanCloud中进入
你创建的应用>数据化存储>结构化数据>选择Class Comment,进行管理。(注意,刚开始是没有Comment这个Class,当博客第一次有评论时,会自动创建,也可以自行先创建)【问题记录1】,在修改_config.yml文件中的appid和appkey时,注意将后面的注释删除掉(有可能会把注释当成appid/appkey的一部分),否则可能会出现401错误。
【问题记录2】,在文章顶部不显示评论数,而是显示valine,此时修改
themes/next/languages/zh-CN.yml文件,在post标签下添加comments.valine: 评论数即可。【问题记录3】,默认情况下,评论右下角会有Valine的角标(Powered By Valinev1.4.14),如果想要将此删除,可以编辑
themes/next/layout/_third-party/comments/valine.swig文件,修改为下面样式即可。1
2
3
4
5
6
7
8
9
10
11
12
13
14
15
16
17
18
19
20
21
22
23
24
25
26
27
28
29
30
31
32
33
34{%- set valine_uri = theme.vendors.valine or '//unpkg.com/valine/dist/Valine.min.js' %}
<script>
NexT.utils.loadComments(document.querySelector('#valine-comments'), () => {
NexT.utils.getScript('{{ valine_uri }}', () => {
var GUEST = ['nick', 'mail', 'link'];
var guest = '{{ theme.valine.guest_info }}';
guest = guest.split(',').filter(item => {
return GUEST.includes(item);
});
new Valine({
el : '#valine-comments',
verify : {{ theme.valine.verify }},
notify : {{ theme.valine.notify }},
appId : '{{ theme.valine.appid }}',
appKey : '{{ theme.valine.appkey }}',
placeholder: {{ theme.valine.placeholder | json }},
avatar : '{{ theme.valine.avatar }}',
meta : guest,
pageSize : '{{ theme.valine.pageSize }}' || 10,
visitor : {{ theme.valine.visitor }},
lang : '{{ theme.valine.language }}' || 'zh-cn',
path : location.pathname,
recordIP : {{ theme.valine.recordIP }},
serverURLs : '{{ theme.valine.serverURLs }}'
});
// 添加以下内容,删除Powered By Valine
var infoEle = document.querySelector('.vpower');
if (infoEle){
infoEle.parentNode.removeChild(infoEle);
}
});
});
</script>
13、修改网站底部信息(footer)
1 | footer: |
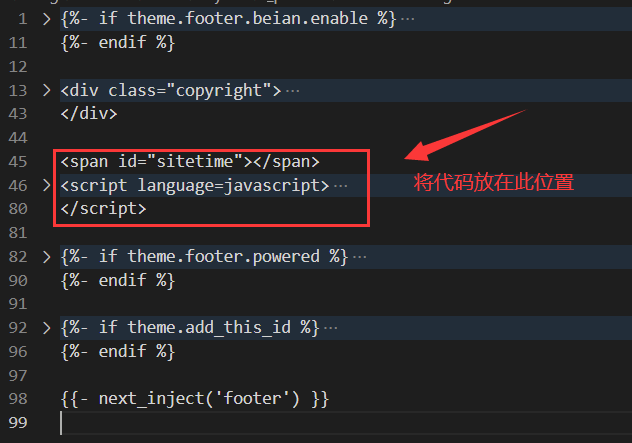
若想在底部显示站点运行时间,可编辑\themes\next\layout\_partials\footer.swig,在下图所在位置添加指定内容
1 | <span id="sitetime"></span> |
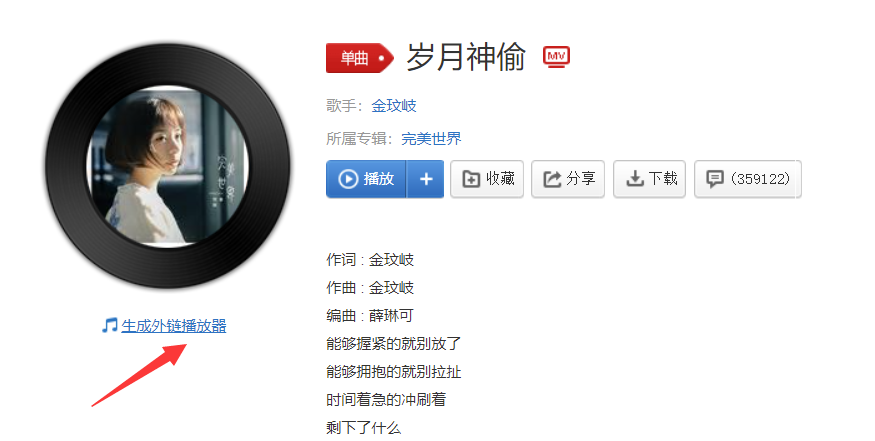
14、添加网易云音乐
- 在网页版网易云音乐中选择自己喜欢的歌曲/歌单,然后点击生成外链播放器,官方教程https://music.163.com/#/outchain/0/786909207/
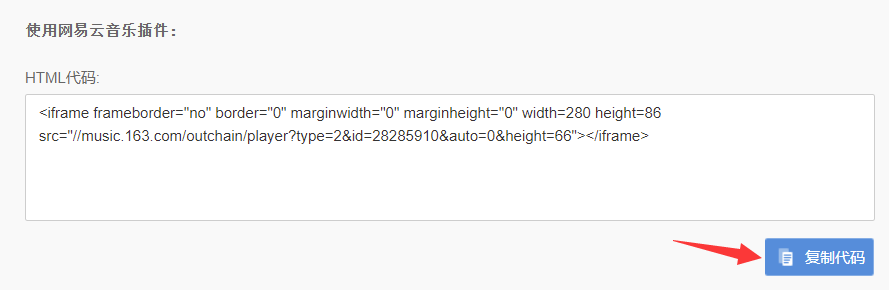
在生成外链界面,修改所要显示的格式以及宽高,然后复制HTML代码
将代码插入到
Blog\themes\next\layout\_macro\sidebar.swig文件中(位置仅供参考,可自行选择所需位置,不同的位置效果呈现的效果不同)。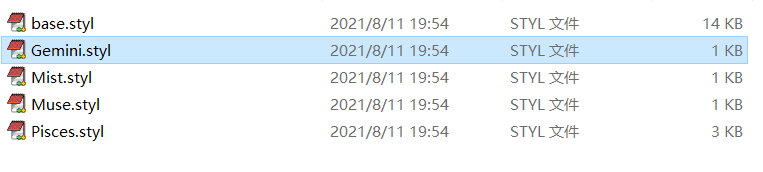
15、设置主题页面布局为圆角
将页面中的方形边框修改为圆角。
打开
Blog\themes\next\source\css\_variables\Gemini.styl文件(我用的是 Gemini 主题风格,如果用的是其他的,就打开相应的文件)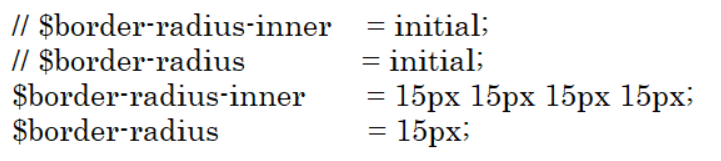
将最低端代码修改为以下内容(可自行修改圆角尺寸,这里以15px为例)
1
2
3
4// $border-radius-inner = initial;
// $border-radius = initial;
$border-radius-inner = 15px 15px 15px 15px;
$border-radius = 15px;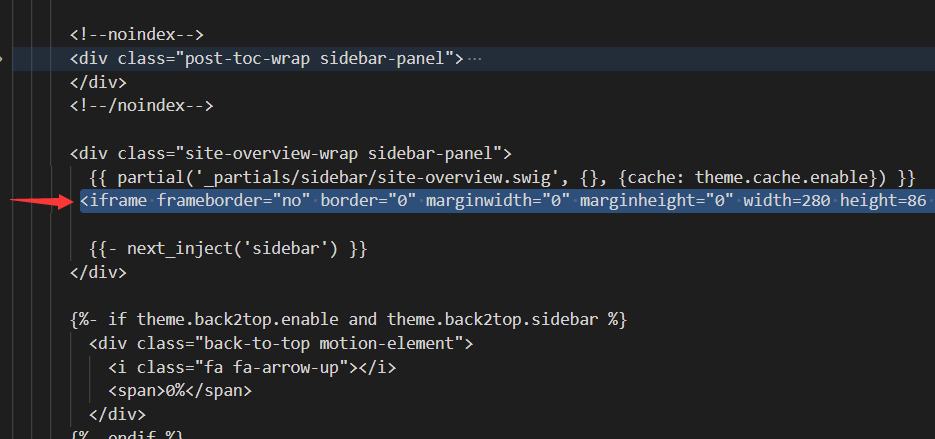
16、添加动态背景(添加动态背景的同时也可以添加静态背景)
Nest支持的常见的动态背景有 Canvas-nest 风格、**JavaScript 3D library 风格 、Canvas-ribbon **风格三种动态背景,但都需要自己手动下载相应静态资源,这里以 JavaScript 3D library 风格为例。
JavaScript 3D library 的官方地址为https://github.com/theme-next/theme-next-three
Git Bash 进入 NexT 文件目录,然后将动态背景模块安装到
source\lib目录1
2cd themes/next
git clone https://github.com/theme-next/theme-next-three source/lib/three修改
Blog\themes\next\_config.yml配置文件,启动 JavaScript 3D library,并且设置three_waves\canvas_lines\canvas_sphere三个中任意一个为true(三个背景的样式不同,可自行选择)1
2
3
4
5three:
enable: true # 启用此动态背景
three_waves: false # 动态背景样式一
canvas_lines: true # 动态背景样式二
canvas_sphere: false # 动态背景样式三
17、鼠标点击出现礼花效果
在
Blog/themes/next/source/js里面新建fireworks.js的文件,并写入以下内容。1
2
3
4
5
6
7
8
9
10
11
12
13
14
15
16
17
18
19
20
21
22
23
24
25
26
27
28
29
30
31
32
33
34
35
36
37
38
39
40
41
42
43
44
45
46
47
48
49
50
51
52
53
54
55
56
57
58
59
60
61
62
63
64
65
66
67
68
69
70
71
72
73
74
75
76
77
78
79
80
81
82
83
84
85
86
87
88
89
90
91
92
93
94
95
96
97
98
99
100
101
102
103
104
105
106
107
108
109
110
111
112
113
114
115
116
117
118
119
120
121
122
123
124
125
126
127
128
129
130
131
132
133
134
135
136
137
138
139
140
141
142
143
144
145
146
147
148
149
150
151
152
153
154class Circle {
constructor({ origin, speed, color, angle, context }) {
this.origin = origin
this.position = { ...this.origin }
this.color = color
this.speed = speed
this.angle = angle
this.context = context
this.renderCount = 0
}
draw() {
this.context.fillStyle = this.color
this.context.beginPath()
this.context.arc(this.position.x, this.position.y, 2, 0, Math.PI * 2)
this.context.fill()
}
move() {
this.position.x = (Math.sin(this.angle) * this.speed) + this.position.x
this.position.y = (Math.cos(this.angle) * this.speed) + this.position.y + (this.renderCount * 0.3)
this.renderCount++
}
}
class Boom {
constructor ({ origin, context, circleCount = 16, area }) {
this.origin = origin
this.context = context
this.circleCount = circleCount
this.area = area
this.stop = false
this.circles = []
}
randomArray(range) {
const length = range.length
const randomIndex = Math.floor(length * Math.random())
return range[randomIndex]
}
randomColor() {
const range = ['8', '9', 'A', 'B', 'C', 'D', 'E', 'F']
return '#' + this.randomArray(range) + this.randomArray(range) + this.randomArray(range) + this.randomArray(range) + this.randomArray(range) + this.randomArray(range)
}
randomRange(start, end) {
return (end - start) * Math.random() + start
}
init() {
for(let i = 0; i < this.circleCount; i++) {
const circle = new Circle({
context: this.context,
origin: this.origin,
color: this.randomColor(),
angle: this.randomRange(Math.PI - 1, Math.PI + 1),
speed: this.randomRange(1, 6)
})
this.circles.push(circle)
}
}
move() {
this.circles.forEach((circle, index) => {
if (circle.position.x > this.area.width || circle.position.y > this.area.height) {
return this.circles.splice(index, 1)
}
circle.move()
})
if (this.circles.length == 0) {
this.stop = true
}
}
draw() {
this.circles.forEach(circle => circle.draw())
}
}
class CursorSpecialEffects {
constructor() {
this.computerCanvas = document.createElement('canvas')
this.renderCanvas = document.createElement('canvas')
this.computerContext = this.computerCanvas.getContext('2d')
this.renderContext = this.renderCanvas.getContext('2d')
this.globalWidth = window.innerWidth
this.globalHeight = window.innerHeight
this.booms = []
this.running = false
}
handleMouseDown(e) {
const boom = new Boom({
origin: { x: e.clientX, y: e.clientY },
context: this.computerContext,
area: {
width: this.globalWidth,
height: this.globalHeight
}
})
boom.init()
this.booms.push(boom)
this.running || this.run()
}
handlePageHide() {
this.booms = []
this.running = false
}
init() {
const style = this.renderCanvas.style
style.position = 'fixed'
style.top = style.left = 0
style.zIndex = '999999999999999999999999999999999999999999'
style.pointerEvents = 'none'
style.width = this.renderCanvas.width = this.computerCanvas.width = this.globalWidth
style.height = this.renderCanvas.height = this.computerCanvas.height = this.globalHeight
document.body.append(this.renderCanvas)
window.addEventListener('mousedown', this.handleMouseDown.bind(this))
window.addEventListener('pagehide', this.handlePageHide.bind(this))
}
run() {
this.running = true
if (this.booms.length == 0) {
return this.running = false
}
requestAnimationFrame(this.run.bind(this))
this.computerContext.clearRect(0, 0, this.globalWidth, this.globalHeight)
this.renderContext.clearRect(0, 0, this.globalWidth, this.globalHeight)
this.booms.forEach((boom, index) => {
if (boom.stop) {
return this.booms.splice(index, 1)
}
boom.move()
boom.draw()
})
this.renderContext.drawImage(this.computerCanvas, 0, 0, this.globalWidth, this.globalHeight)
}
}
const cursorSpecialEffects = new CursorSpecialEffects()
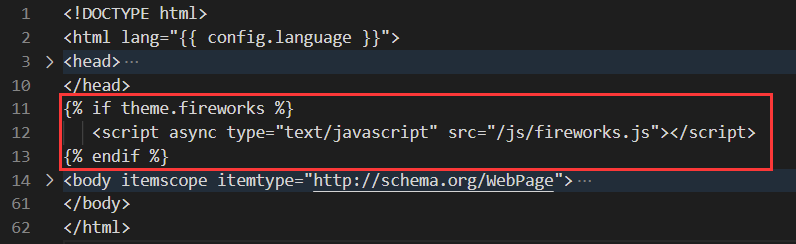
cursorSpecialEffects.init()修改
Blog\themes\next\layout\_layout.swig文件,添加如下内容:1
2
3{% if theme.fireworks %}
<script async type="text/javascript" src="/js/fireworks.js"></script>
{% endif %}
打开
Blog\themes\next\_config.yml配置文件,在任意位置添加以下内容1
2# 鼠标点击,出现烟花效果
fireworks: true
18、修改网页图标
Hexo 博客的默认图标是 N,可自定义修改,步骤如下:
准备一张 16*16 大小的 png 格式图标和一张 32*32 大小的png格式图标,然后放置到
Blog\themes\next\source\images文件夹下。修改
Blog\themes\next\_config.yml配置文件1
2
3favicon:
small: /images/tiger_16_16.png # 自定义16*16图片的路径名
medium: /images/tiger_32_32.png # 自定义32*32图片的路径名
19、添加页面萌宠
使用live2d插件,官方网址:https://github.com/EYHN/hexo-helper-live2d
安装 live2d 插件,在 Git Bash 中输入以下命令(Blog 文件夹内):
1
npm install hexo-helper-live2d --save
默认在页面中展示的是 shizuku,如下图所示。
根据爱好可自行选择自己的萌宠,所有萌宠在https://huaji8.top/post/live2d-plugin-2.0/中有gif动图展示,下面是名称。
1
2
3
4
5
6
7
8
9
10
11
12
13
14
15
16
17
18
19
20
21
22live2d-widget-model-chitose
live2d-widget-model-epsilon2_1
live2d-widget-model-gf
live2d-widget-model-haru/01
live2d-widget-model-haru/02
live2d-widget-model-haruto
live2d-widget-model-hibiki
live2d-widget-model-hijiki
live2d-widget-model-izumi
live2d-widget-model-koharu
live2d-widget-model-miku
live2d-widget-model-ni-j
live2d-widget-model-nico
live2d-widget-model-nietzsche
live2d-widget-model-nipsilon
live2d-widget-model-nito
live2d-widget-model-shizuku
live2d-widget-model-tororo
live2d-widget-model-tsumiki
live2d-widget-model-unitychan
live2d-widget-model-wanko
live2d-widget-model-z16比如选择
live2d-widget-model-wanko,在 Git Bash 中输入以下命令:1
npm install live2d-widget-model-wanko --save
编辑
Blog\_config.yml文件,添加以下内容:1
2
3
4
5
6
7
8
9
10
11
12# live2d插件
live2d:
enable: true # 是否启用
scriptFrom: local # 使用本地脚本文件
model:
use: live2d-widget-model-wanko # 所使用的萌宠【修改为自己想要】
display: # 萌宠放置位置以及大小
position: right
width: 150
height: 300
mobile: #是否在手机端显示
show: false
注意:live2d可能会与不蒜子计数出现冲突,解决方案见:https://blog.csdn.net/weixin_37891983/article/details/105362748
20、添加文章结束提示语
将下面代码插入到 themes\next\layout\_macro\post.swig 文件的END POST BODY下面:
1 | <div> |

注意文档编码应为 UTF-8.
21、添加本地搜索
使用 Git Bash 安装搜素插件:
1 | npm install hexo-generator-searchdb --save |
打开 Blog\_config.yml 配置文件,在任意位置添加以下内容:
1 | # 本地搜索 |
修改 Blog\themes\next\_config.yml 文件:
1 | local_search: |